
15 Stunning Staircase Gallery Wall Ideas That Turn Blank Stairs Into Art
A staircase gallery wall is simply a curated arrangement of…
A staircase gallery wall is simply a curated arrangement of framed art, photographs, and objects hung along the wall that climbs with your stairs. The one rule that matters: the arrangement must follow the staircase’s slope, not fight it. Get that right and even a handful of inexpensive prints look like a designed moment; get it wrong and the wall reads as decoration that drifted uphill by accident.
Staircases are transitional spaces, viewed up close and from constantly shifting heights — much like the corridors covered in hallway decor ideas — which means they reward bold, legible art over fussy detail. These 15 ideas work for straight flights, L-shaped stairs, and narrow stairwells alike.
1. Map the Staircase Gallery Wall Diagonal Before You Hang Anything
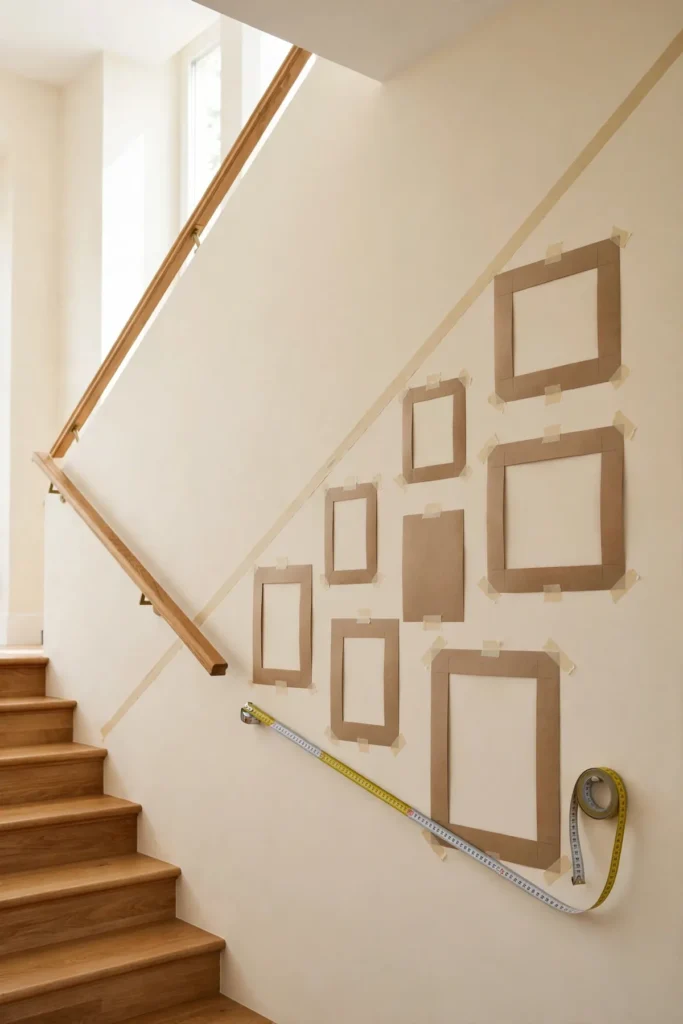
Hallway decor ideas and staircase walls share one golden rule: follow the slope. Instead of hanging frames in a level grid, step each frame up the wall so the arrangement climbs at the same angle as your stairs. Tape the layout out first with painter’s tape, keeping the center of the arrangement about 60 inches above each tread below it. Because the eye reads the diagonal as intentional, even a simple set of matching frames looks like a designed moment — the foundation of a staircase gallery wall that feels custom rather than accidental.
Quick tips
- Keep 2–3 inches between frames for a calm, even rhythm.
- Start hanging from the middle of the staircase and work outward.
- Photograph the taped layout before drilling a single hole.
2. Anchor the Landing With One Oversized Canvas
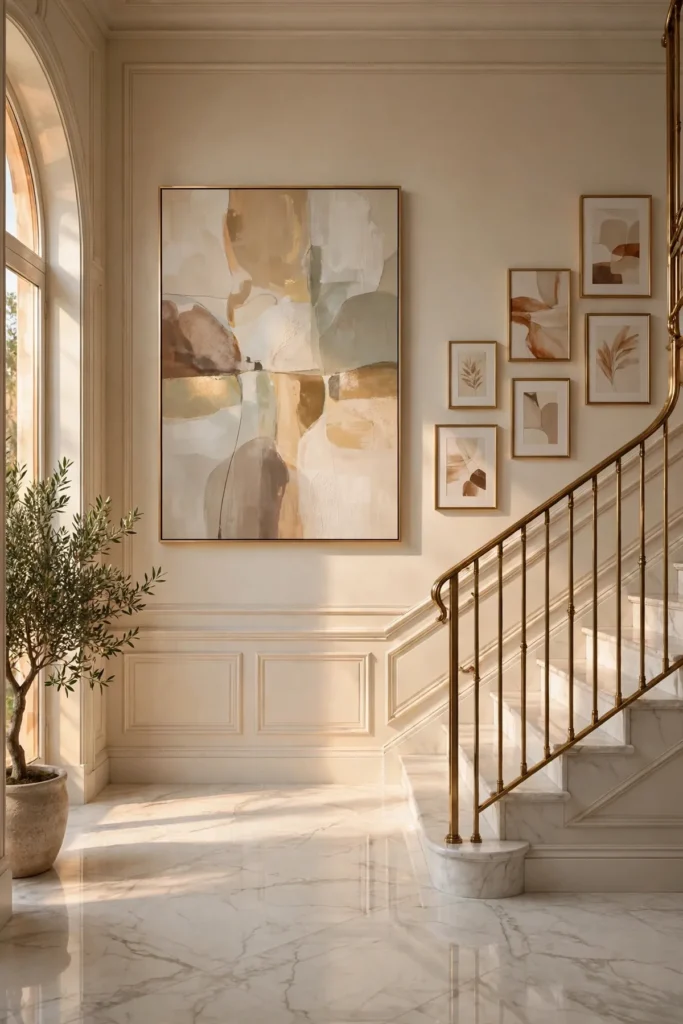
Landings are the natural pause points of a staircase, and one oversized canvas turns that pause into a destination. Choose a single large-scale print or canvas — roughly two-thirds the width of the landing wall — and let smaller frames climb away from it in both directions. This anchor-piece approach makes a staircase gallery wall feel composed even when the rest of the collection is eclectic, because the big canvas sets the color story and the scale for everything around it.
Quick tips
- Hang the center of the canvas at eye level from the landing floor.
- Echo one color from the canvas in two or three smaller frames.
- Give the oversized piece breathing room — nothing within 6 inches.
3. Tell Your Family’s Story as It Climbs
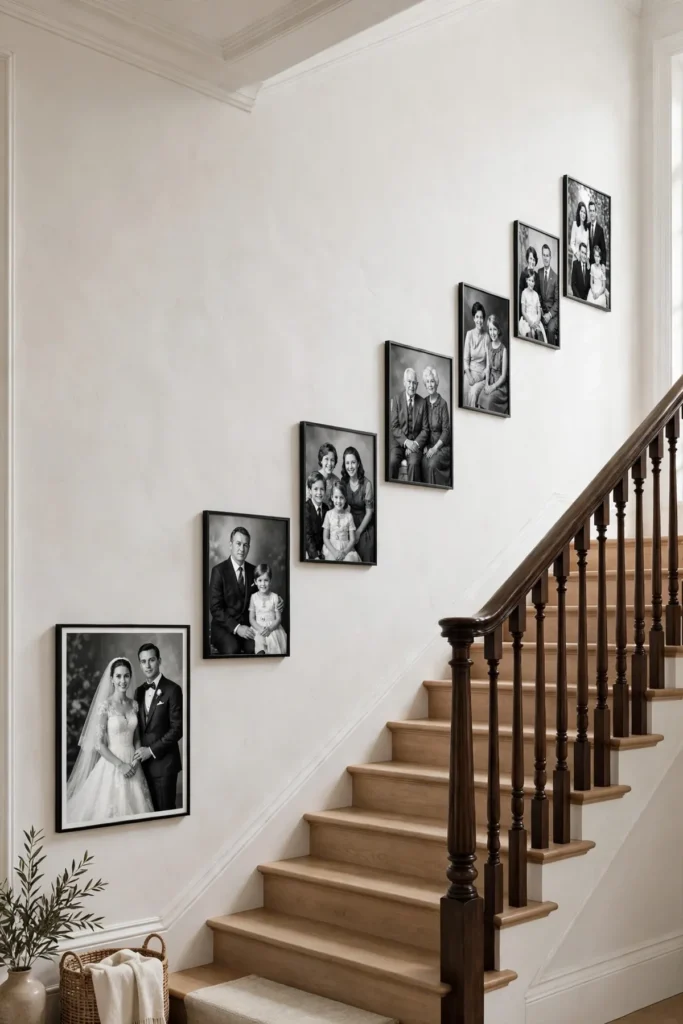
A staircase is already a journey upward, so make your staircase gallery wall a journey through time: arrange family photos chronologically from the bottom step to the top. Start with grandparents or early years at the base and end with the most recent snapshots near the landing. Use identical frames and mats so the changing faces — not the frames — tell the story. Guests will literally walk through your family’s history, which makes this the most complimented staircase gallery wall layout of all.
Quick tips
- Convert all photos to the same finish — all color or all black-and-white.
- Add small date labels under frames for a museum-wall feel.
- Leave two empty frames at the top for future memories.
4. Split One Panorama Across Climbing Frames
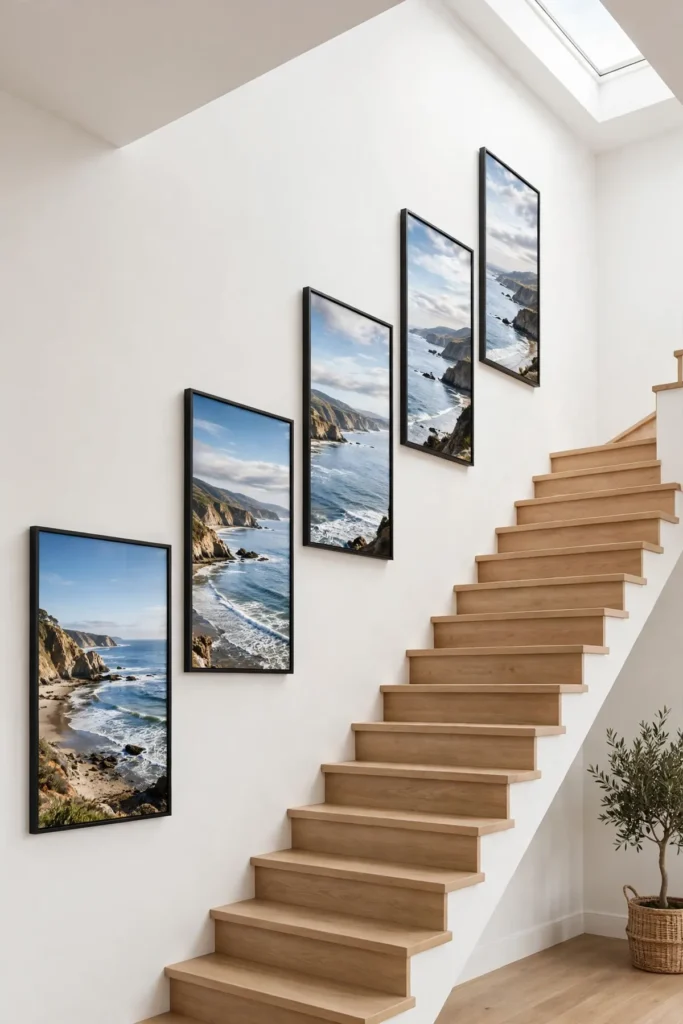
For maximum drama, take one sweeping panoramic photograph — a coastline, a mountain range, your favorite city skyline — and split it across three or more frames that climb with the stairs. Print each slice separately and hang them in sequence so the image reads as one continuous scene as you ascend. This staircase gallery wall idea delivers serious wow factor because the eye can’t help but follow the image upward, piecing the panorama together step by step.
Quick tips
- Use identical thin frames with no mats so the slices align seamlessly.
- Keep 1–2 inch gaps between frames so the panorama reads as one image.
- Order prints from the same lab batch to avoid color shifts between slices.
5. Let Frame Sizes Shrink as You Climb
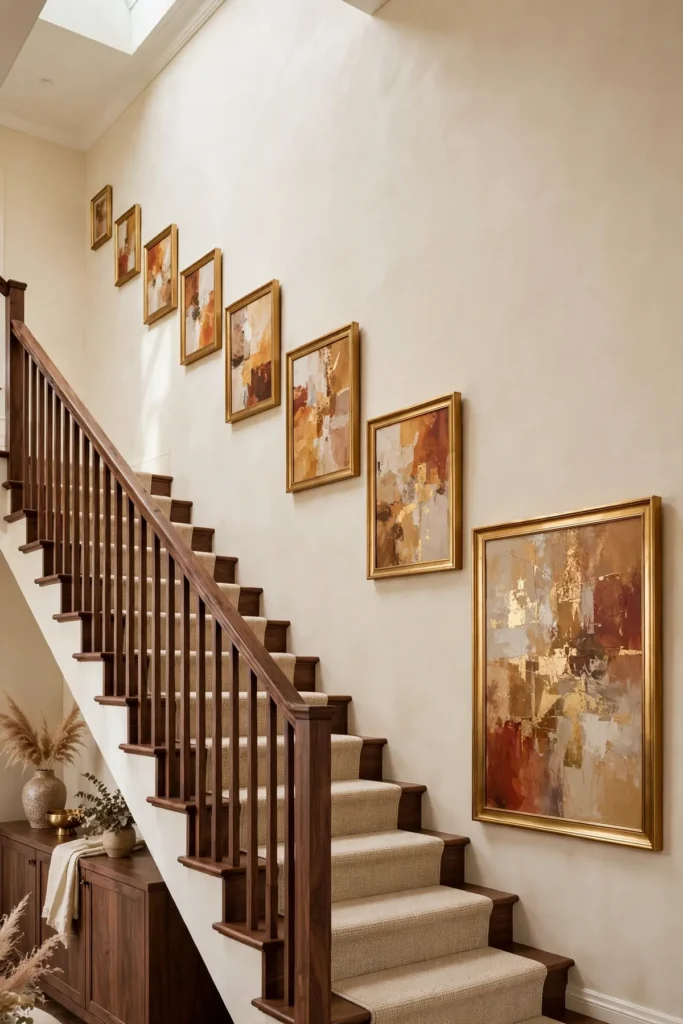
Here’s a designer’s trick for staircases: let your frame sizes shrink as the wall climbs. Start with the largest frames at the bottom of the stairs and graduate to smaller ones toward the landing. This descending scale mirrors the natural perspective of looking up a staircase and makes the whole staircase gallery wall feel rhythmic and intentional. Keep the frame style consistent so the shrinking sizes — not mixed finishes — create the pattern.
Quick tips
- Start with your largest frame at the bottom step and shrink upward.
- Keep frame finishes identical so size does the talking.
- Step down one frame size every 3–4 stairs for a smooth gradient.
6. Light It Like a Gallery With Battery Picture Lights
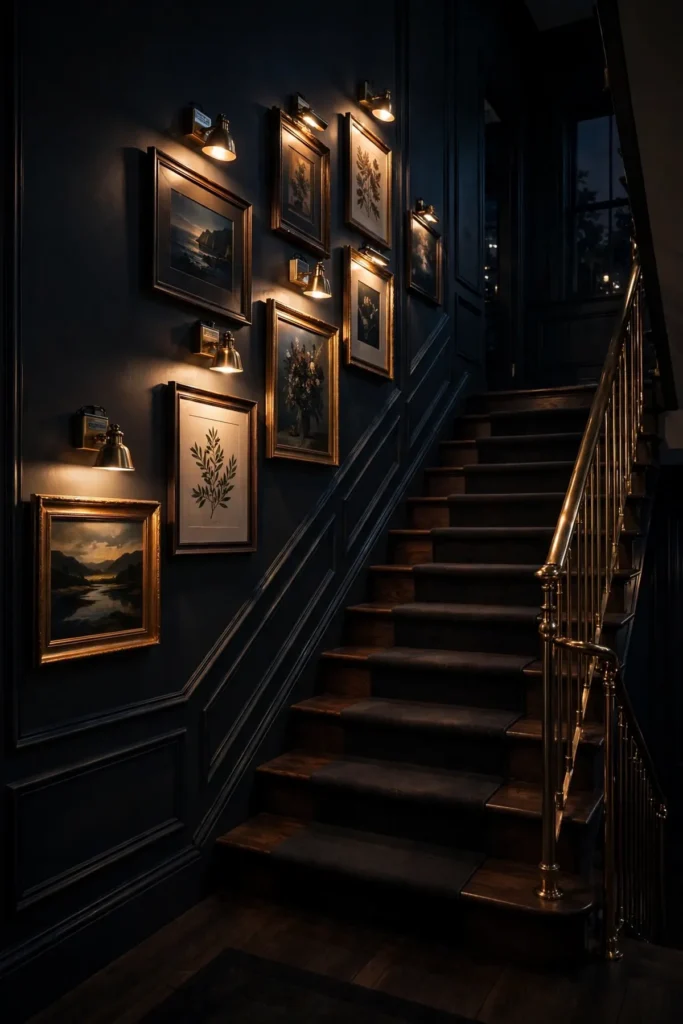
Stairwells are notoriously dim, and nothing flattens art faster than bad lighting. Battery-powered picture lights — slim LED bars that mount above each frame with no wiring — give your staircase gallery wall true gallery treatment. Space one light over every two to three frames, angling them to wash light evenly across the art. Warm-white LEDs (around 2700K) flatter both art and skin tones as you climb.
Quick tips
- Choose rechargeable picture lights to avoid constant battery swaps.
- Mount lights 4–6 inches above each frame for even coverage.
- Use warm-white 2700K LEDs for a cozy gallery glow.
7. Frame Maps, Tickets, and Postcards From Your Travels
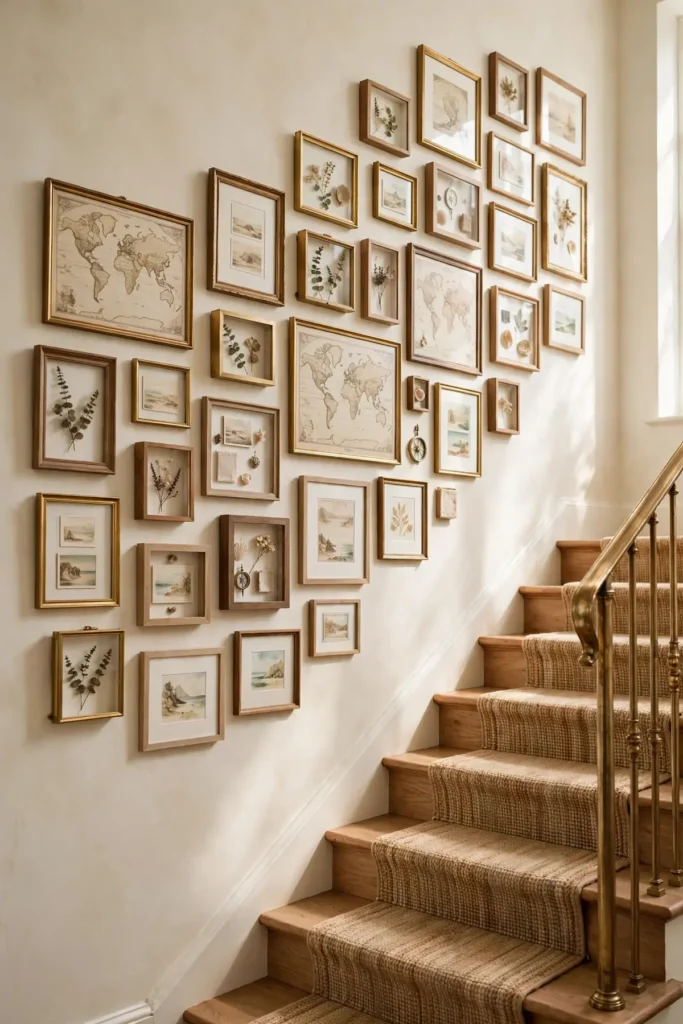
Turn the climb into a world tour. Vintage maps, city prints, and framed travel photos make a staircase gallery wall that tells your story one destination at a time. Tuck in ticket stubs, postcards, and boarding passes in small shadow-box frames between the larger pieces for texture and nostalgia. Arrange pieces in the order you visited them, or cluster by continent as the stairs turn — either way, guests will linger on every step.
Quick tips
- Back travel photos with map-print mats for a layered look.
- Mark visited cities with small pins on one large framed map.
- Stick to a warm, aged-paper palette to keep maps cohesive.
8. Build a Botanical Climb in Natural Oak Frames
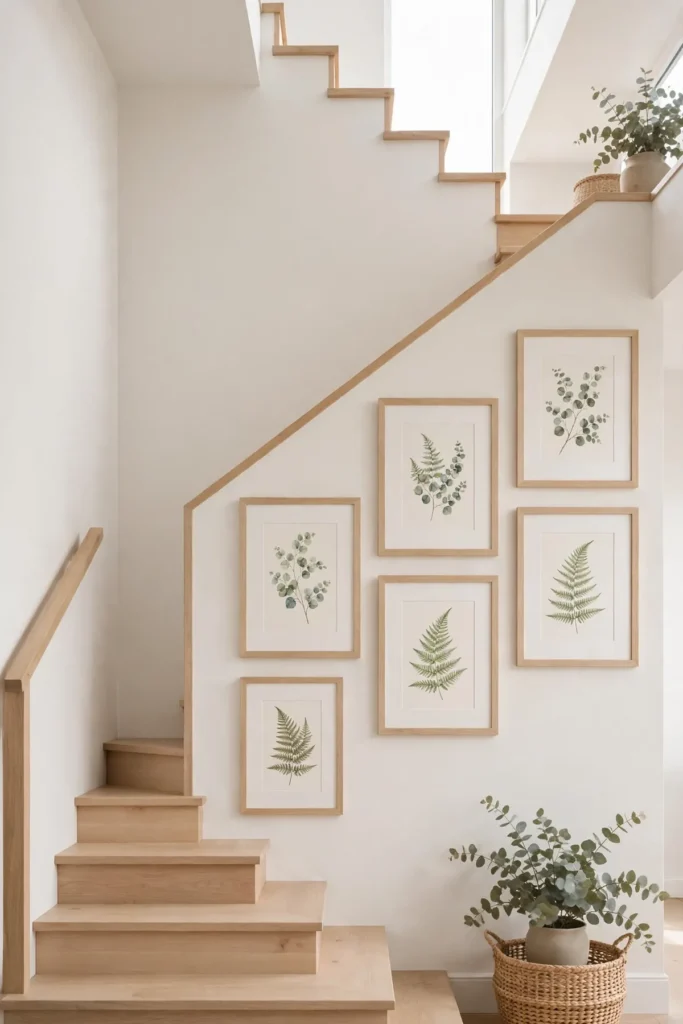
Staircases can feel hard and echoey — all angles, railings, and foot traffic. Botanical prints soften everything, especially in warm natural oak frames that echo wooden stair treads. Ferns, eucalyptus stems, and oversized leaves bring organic curves that contrast beautifully with the straight lines of stairs. For a cohesive staircase gallery wall, pick prints from a single series, frame them identically in oak, and let the wall feel like walking up through a conservatory.
Quick tips
- Choose prints with plenty of white space so the wall breathes.
- Match oak frame tones to your stair treads or handrail.
- Press real leaves in floating frames for a personal touch.
9. Mix Portrait and Landscape Orientations for Organic Rhythm
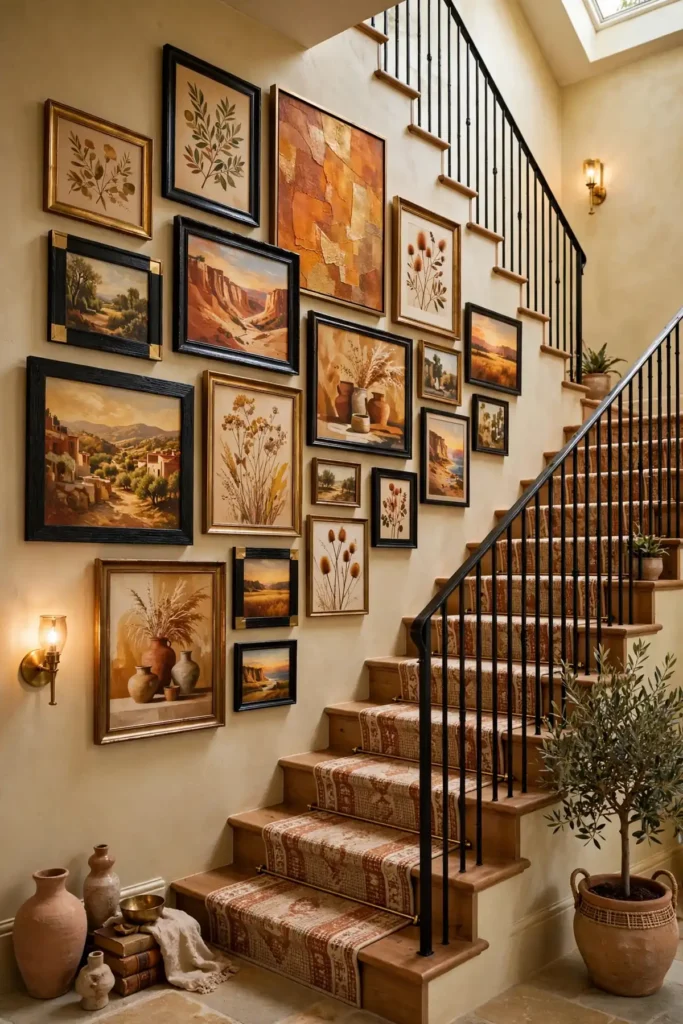
Uniform grids are safe, but mixing portrait and landscape orientations gives your staircase gallery wall an organic, collected rhythm that suits the diagonal climb. Alternate tall and wide frames so the eye bounces naturally from piece to piece. The trick is keeping a consistent gap and a shared frame finish — the varied orientations provide the energy while the finish keeps the staircase gallery wall calm and cohesive.
Quick tips
- Pair every portrait frame with a landscape one nearby for balance.
- Keep gaps consistent (2–3 inches) so mixed orientations look deliberate.
- Use one frame finish across all orientations for cohesion.
10. Frame Your Kids’ Artwork by Year as It Climbs
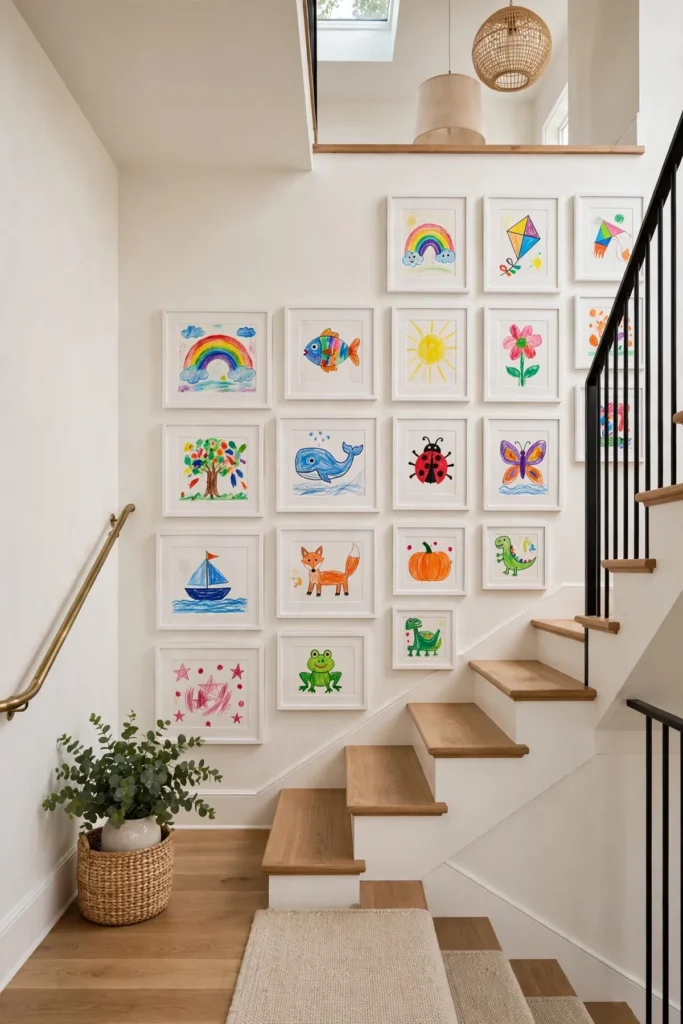
Children’s art deserves better than the fridge door. Frame your kids’ best paintings and drawings in real frames with real mats, and arrange them by school year as they climb the stairs — preschool at the bottom, this year’s masterpieces at the top. The uniform framing elevates crayon and watercolor into a genuine staircase gallery wall collection, and kids walk past their own growing creativity every single day.
Quick tips
- Use identical white mats to unify wildly different artworks.
- Scan originals and frame the prints — keep precious originals safe.
- Let each child ‘curate’ their own section of the stairs.
11. Try the No-Drill Ledge Approach for Renters
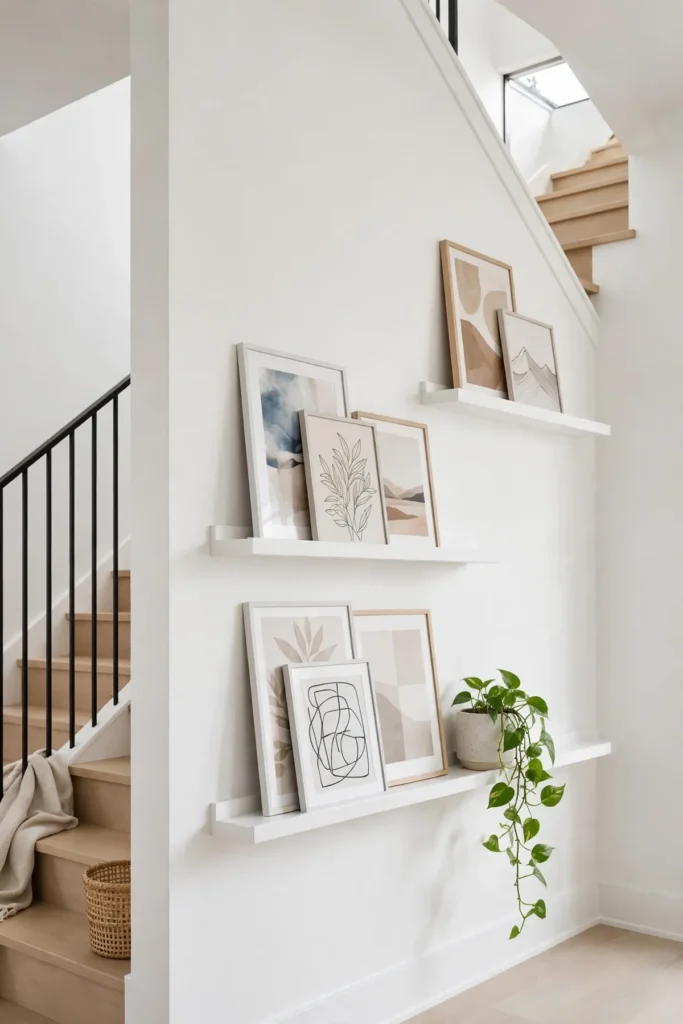
If the thought of drilling twenty holes makes you wince — or your lease forbids it — a slim picture ledge is your answer. Mount one or two long ledges parallel to the stair slope with minimal hardware, then lean framed art along them. A ledge-based staircase gallery wall is endlessly restyleable: swap prints seasonally, layer small frames in front of large ones, and overlap pieces for that collected look. When you move, the ledges come down with just a few small holes to patch.
Quick tips
- Choose ledges at least 1.5 inches deep so frames sit securely.
- Add a small lip or museum putty for extra stability.
- Layer frames at varying heights for a relaxed, dimensional feel.
12. Let One Saturated Wall Color Carry the Whole Gallery
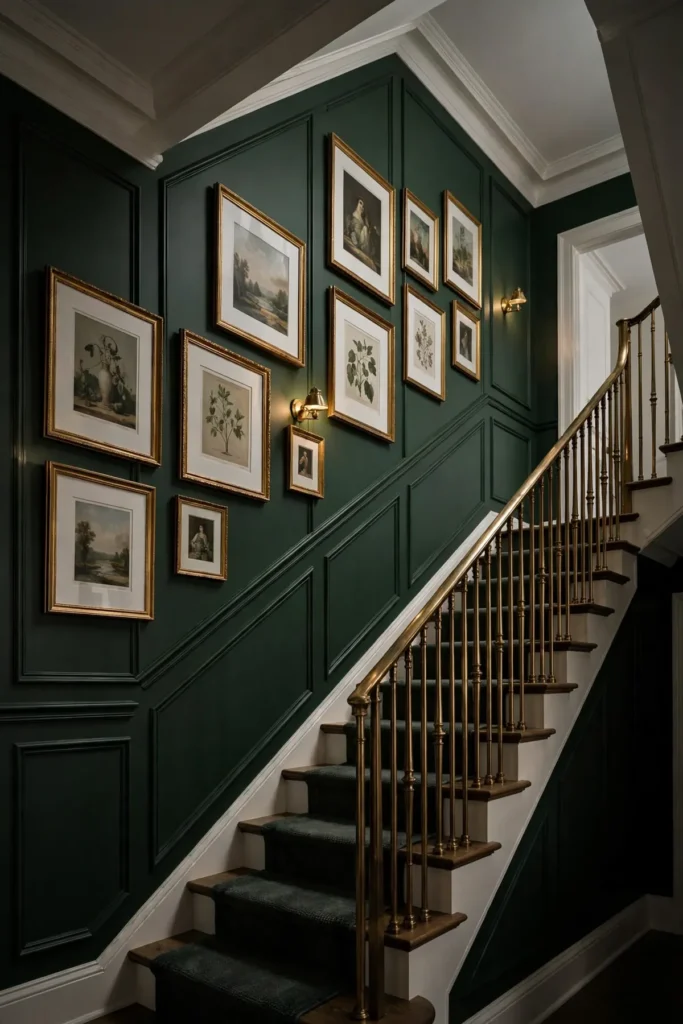
The boldest staircase gallery wall idea costs less than a can of paint: give the stairwell wall a dramatic, saturated backdrop before you hang a single frame. Deep navy, moody green, or warm charcoal makes art pop and turns an ordinary staircase into a gallery experience. Paint first, then choose frames that contrast — brass and light oak sing against dark walls. This one change delivers more drama per dollar than any other staircase gallery wall idea.
Quick tips
- Test paint in the stairwell’s actual light — it shifts on stairs.
- Use light-colored mats so art doesn’t vanish into dark paint.
- Paint the handrail or risers to match for a fully designed look.
13. Hang Mirrors Between Frames to Double the Light
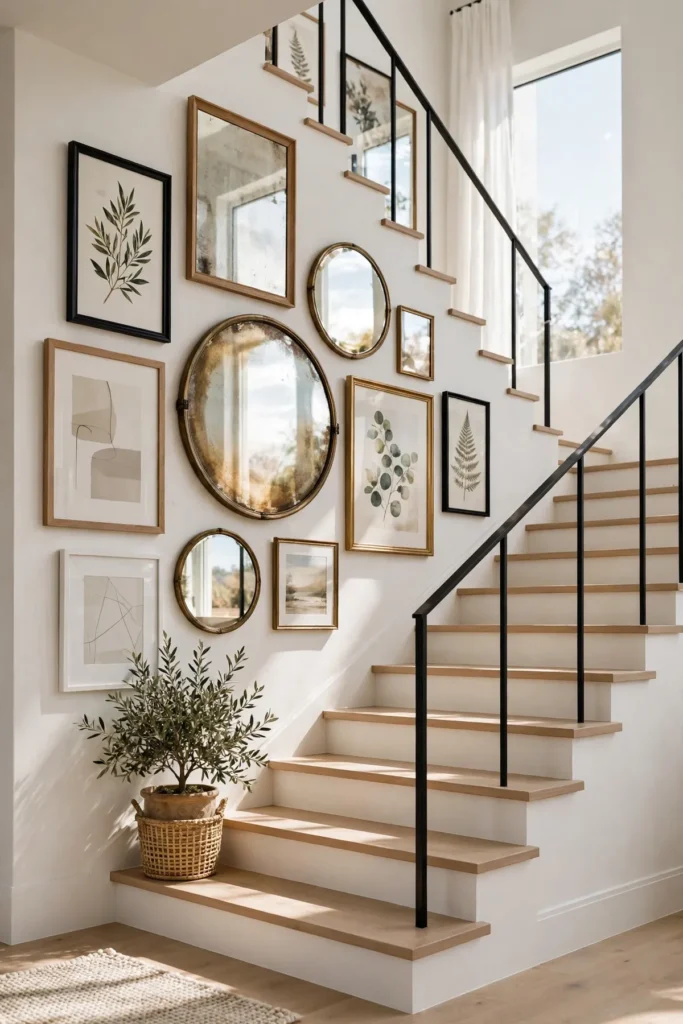
Most stairwells are light-starved, and mirrors are the fastest fix. Intersperse round, arched, or sunburst mirrors among your frames and your staircase gallery wall will double whatever daylight the stairs get. Mirrors also add depth, making a narrow stairwell feel twice as wide. Keep mirror frames in the same finish as your art frames so they read as part of the staircase gallery wall collection rather than random additions.
Quick tips
- Angle mirrors slightly to catch windows, not blank walls.
- Mix mirror shapes but keep one consistent frame finish.
- Avoid placing mirrors where they’ll throw glare into eyes on the stairs.
14. Add Small Sculptural Objects for Depth
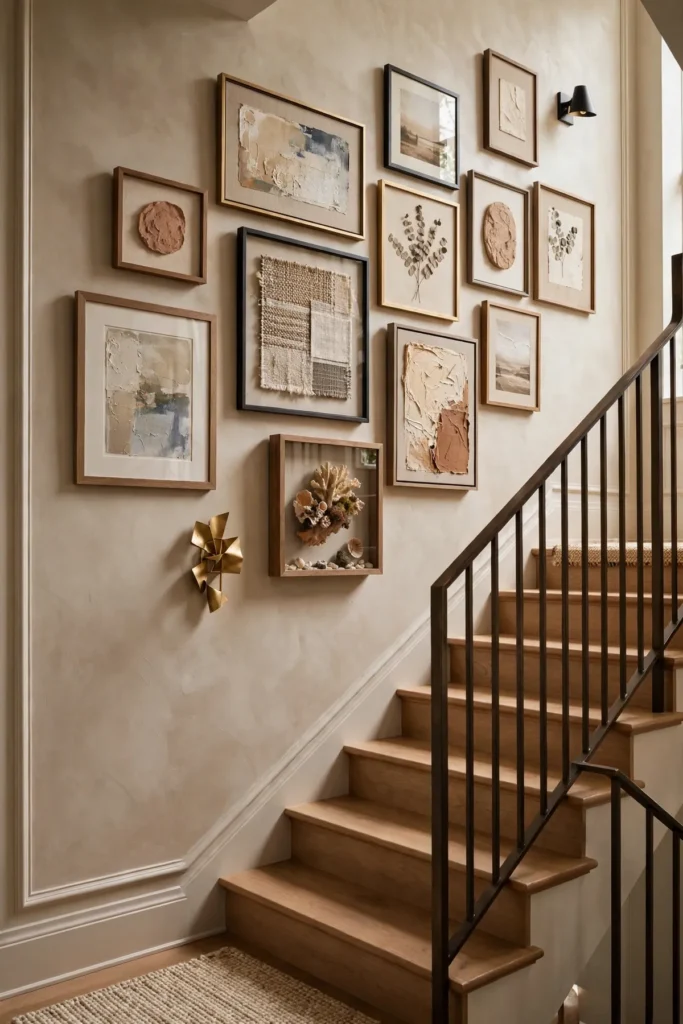
A staircase gallery wall doesn’t have to be flat. Woven baskets, ceramic plates, hats, or small wall sculptures add shadow and dimension that framed prints can’t. The changing viewpoint of a staircase is actually the perfect place for dimensional pieces — you see them from below, straight-on, and above as you climb. Keep a consistent color story across the objects, and intersperse them with a few flat frames so the wall still reads as a staircase gallery wall.
Quick tips
- Use secure hangers rated for the object’s weight — stairs vibrate.
- Limit dimensional pieces to one-third of the arrangement.
- Repeat materials (all rattan, all ceramic) for cohesion.
15. Do the Bottom-of-the-Stairs Walk-Through Before You Commit
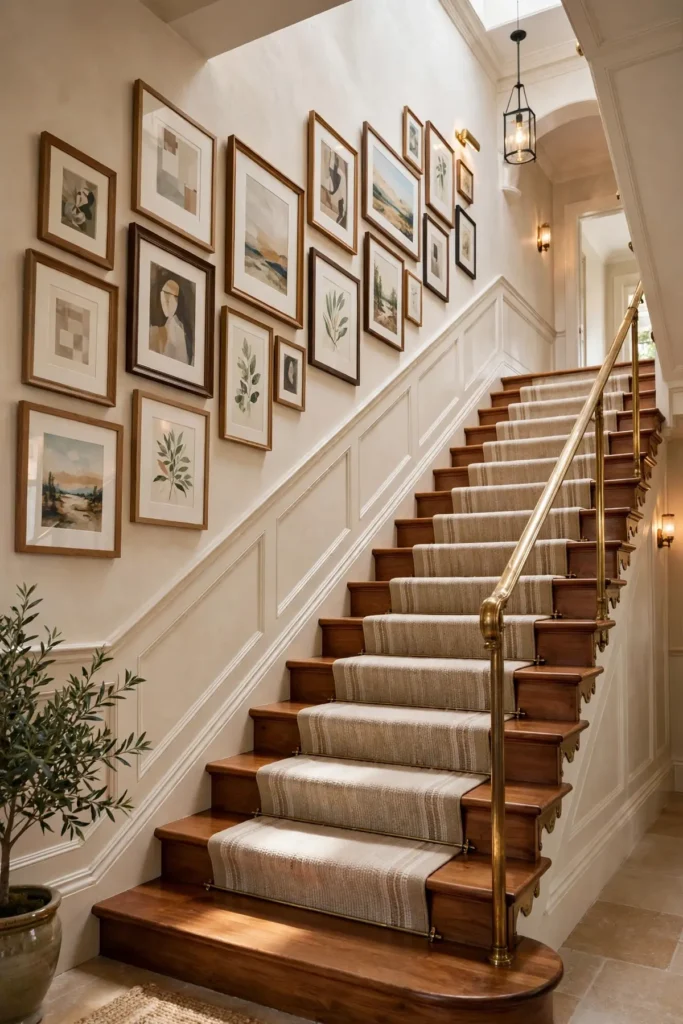
Before you drill a single hole, do the bottom-of-the-stairs walk-through. Stand at the base of your staircase and sight up the entire wall, checking that frames align with the slope, spacing feels even, and no piece gets visually cut off by the handrail. Walk up slowly, viewing the staircase gallery wall from every step — this is how guests will actually see it. Adjust your painter’s tape layout until the walk-through feels effortless, then commit to the drill.
Quick tips
- View the taped layout from the bottom, middle, and top of the stairs.
- Check that no frame is hidden behind the handrail from key angles.
- Live with the tape layout for 24 hours before drilling.
Start Climbing: Your Staircase Gallery Wall Awaits
Fifteen ideas, one blank wall, zero excuses. Whether you start with a single picture ledge or commit to a full floor-to-landing timeline, the secret is the same: follow the slope, repeat one unifying element, and hang the first frame this weekend. Your staircase gallery wall doesn’t need to be perfect — it needs to be started. Pick the idea that made you smile, gather your frames, and turn those blank stairs into the most interesting wall in your home.