
15 Brilliant Tiny Home Remodel Ideas That Make Small Spaces Feel Luxurious
A successful tiny home remodel doesn’t start with paint swatches…
A successful tiny home remodel doesn’t start with paint swatches — it starts with layout, light, and storage. The renovations that transform small homes are structural decisions: which walls can come down, where daylight can enter, and how every cubic foot can work twice as hard. Decor finishes the job, but the remodel itself is what makes a 400-square-foot home feel like 800.
The 15 ideas below are real renovation moves, ordered from the highest-impact structural changes to the finishing tricks that make everything feel seamless. Each one names who it’s best for, because a wet-room bathroom is genius for one owner and wrong for another. And once the bones are right, styling it warm is easy — our guide to cozy cottage decor pairs beautifully with the cottage-scale charm most tiny homes already have.
Tiny Home Remodel Ideas for Open-Plan Living

The single biggest transformation in a tiny home remodel is removing interior partitions. Walls that chop a small footprint into a galley kitchen, a corridor, and a boxed-in bedroom destroy sightlines — and sightlines are what make a space feel large. Taking down even one non-load-bearing wall between the kitchen and living area lets daylight travel the full depth of the home and makes the whole footprint readable at a glance.
Best for owners who cook and entertain in one zone and don’t need a fully closed-off bedroom. Keep a structural engineer’s eye on the plan: in many tiny builds the interior walls aren’t load-bearing, but verify before swinging a hammer. Where a wall must stay, cut it down to a half-wall or a wide cased opening to keep most of the openness.
Quick tips
- Map sightlines before demo — stand at the entry and note every wall blocking your view to a window.
- Replace removed walls’ lost storage with a floor-to-ceiling unit on the one wall that stays.
- Keep flooring continuous through the opened space so the eye reads it as one room.
Swap Swing Doors for Pocket or Barn Doors
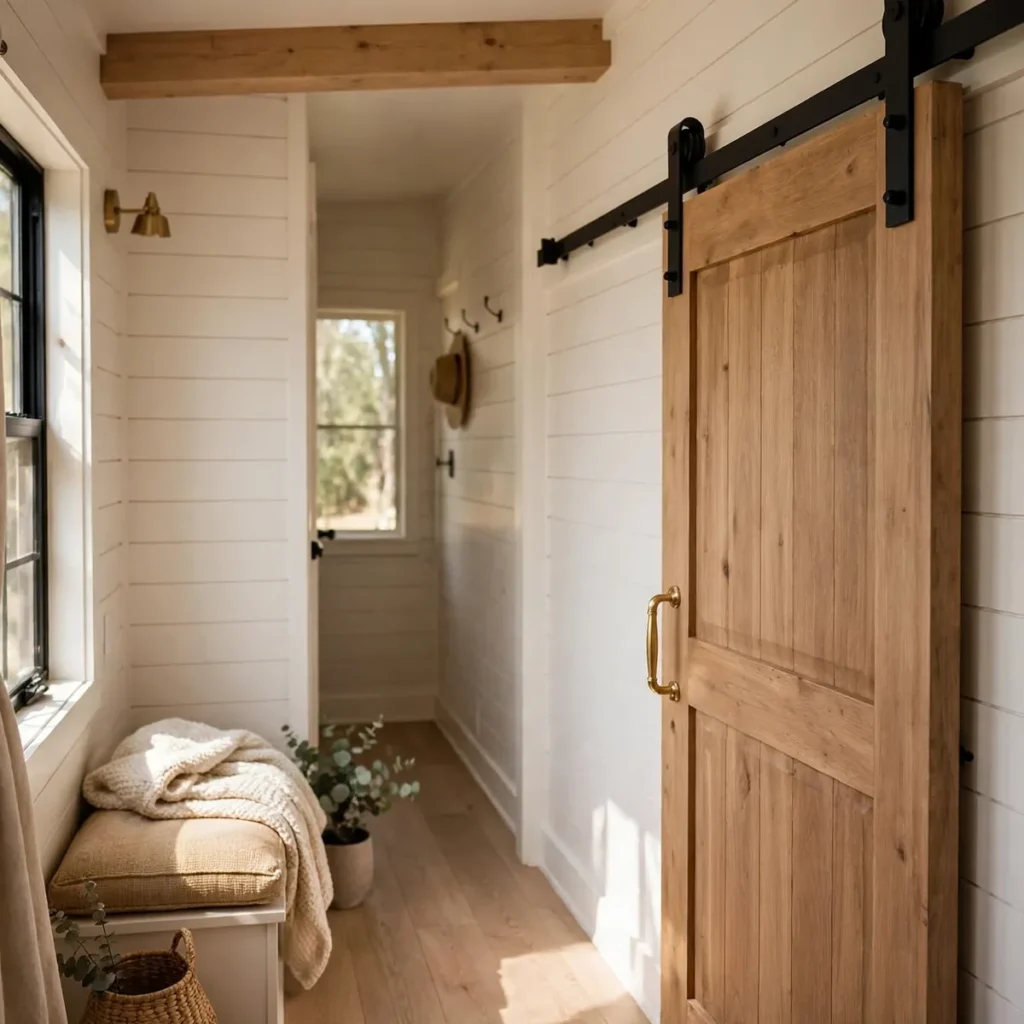
A standard interior door needs roughly nine square feet of clear swing space — in a tiny home, that’s a luxury no room can afford. Pocket doors slide into the wall cavity and reclaim that footprint entirely, while surface-mounted barn doors give the same clearance savings where wall cavities are too thin or already full of plumbing.
Best for bathrooms, bedrooms, and closets where door swing currently collides with fixtures or furniture. Pocket doors need planning during a remodel because the wall must be opened to install the track; barn doors are the easier retrofit. Either way, choose solid-core or well-sealed doors for the bathroom so privacy doesn’t suffer.
Quick tips
- Use pocket doors where the adjoining wall has no plumbing or electrical runs.
- Pick barn-door hardware rated for at least 1.5x the door’s weight — sagging ruins the look.
- Add soft-close mechanisms so sliding doors don’t slam in a small, echo-prone home.
Add a Skylight or Sun Tunnel
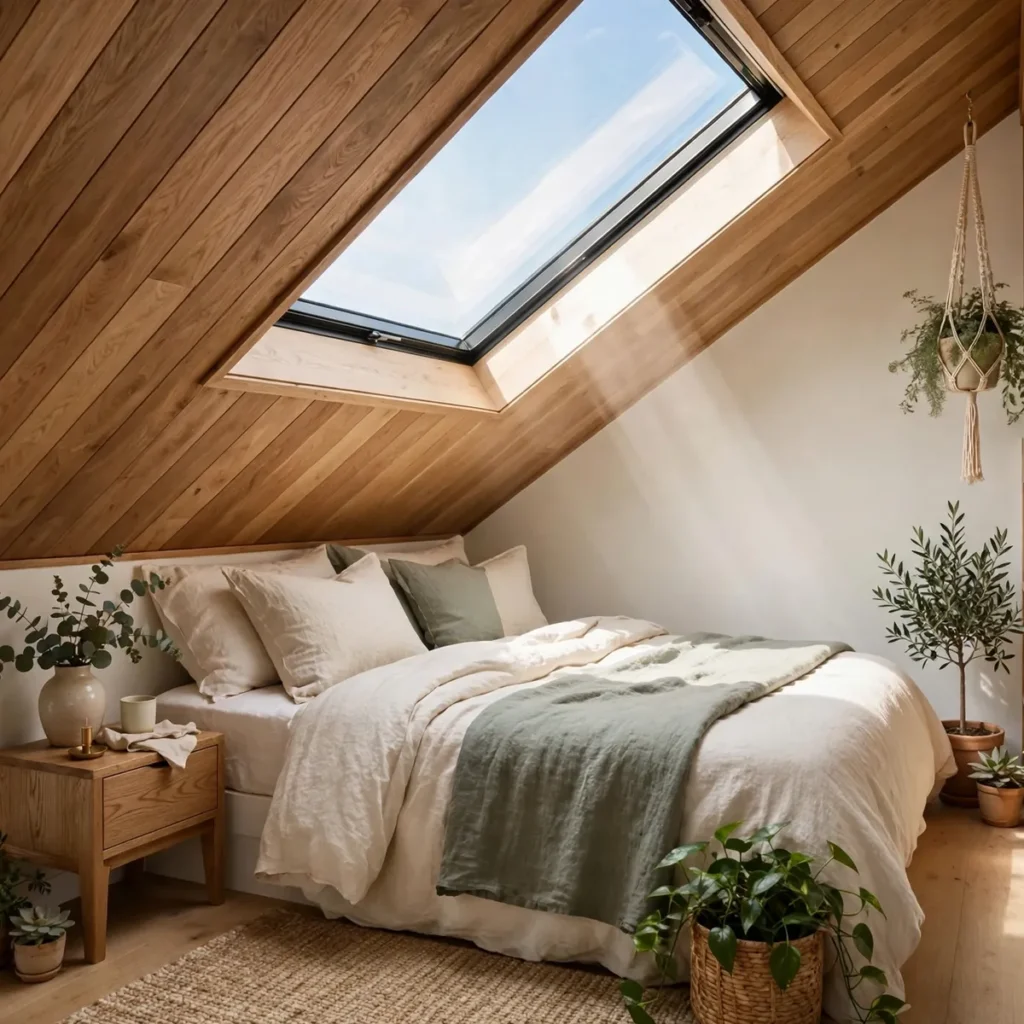
Nothing makes a tiny interior feel bigger than daylight arriving from above. A skylight over the living zone or kitchen pulls the eye upward, erases the cave feeling of a low ceiling, and at night frames actual stars — a genuine luxury in a small home. Where roof structure or budget rules out a full skylight, a sun tunnel (a reflective tube from roof to ceiling) floods a dark hallway or bathroom with daylight for a fraction of the cost and labor.
Best for homes with dark central zones far from windows, and for loft bedrooms where a skylight doubles as stargazing. Position skylights where they’ll wash a wall or the kitchen work surface, not directly over a TV or sleeping pillow — glare and summer heat gain are the two real downsides. Venting skylights add airflow, which matters enormously in a tightly sealed tiny envelope.
Quick tips
- A sun tunnel installs in half a day and suits bathrooms and hallways perfectly.
- Specify low-E, double-glazed skylights to control heat gain.
- Add a remote-controlled blind for bedrooms — morning sun is romantic until it’s 6 AM in July.
Build a Storage Staircase to the Loft

If your tiny home has a sleeping loft reached by a ladder, the remodel with the best return is replacing that ladder with a staircase where every tread is a drawer. A ladder wastes a wall’s worth of storage and makes the loft feel like an attic; a storage staircase turns the climb into the home’s dresser, pantry overflow, and linen closet in one, while making the loft genuinely accessible for daily use.
Best for owners who actually sleep in the loft every night — safer stairs change loft life completely. Design the staircase along an exterior wall so the drawers don’t eat living-zone floor space, and make the treads deep enough (at least 10 inches) to climb comfortably. Alternating-tread designs save length where a full staircase won’t fit.
Quick tips
- Size drawers for real categories: deep ones for bedding, shallow ones for daily clothes.
- Add LED strip lighting under each tread nosing for safe nighttime climbs.
- Keep the handrail slim and wall-mounted so it doesn’t narrow the stair.
Convert the Bathroom Into a Wet Room

A conventional tiny bathroom wastes space on a shower curb, a swinging glass door, and dead corners. A wet room — the entire bathroom tanked (waterproofed) with a single sloped floor draining to one point — removes every barrier. The shower zone simply becomes the room, the space reads twice as large, and cleaning is a squeegee job instead of a grout-scrubbing project.
Best for owners doing a full bathroom gut who want a spa-like feel in minimal square footage. The non-negotiables are proper tanking membrane, a single-slope floor to a linear or center drain, and an extractor fan sized generously — a wet room lives or dies on ventilation. Wall-hung fixtures keep the floor visually clear and make the waterproofing simpler.
Quick tips
- Slope the whole floor 1–2% toward the drain — no flat spots, no puddles.
- Use large-format tile or microcement to minimize grout lines.
- Hang a heated towel rail — it doubles as the room’s radiator in winter.
Add a Pull-Out Pantry and Fold-Down Counter

Tiny kitchens fail at two things: dry-goods storage and usable counter space. The remodel fix is a tall pull-out pantry unit that slides an entire wall of shelving out of a 12-inch-wide cabinet — every jar visible and reachable — paired with a fold-down counter extension that gives you real prep space at mealtimes and vanishes against the wall afterward.
Best for serious cooks in small kitchens. The pull-out pantry belongs next to the fridge or range, wherever a narrow filler gap currently wastes space. Mount the fold-down counter at standard counter height (36 inches) with brackets rated well above the load of a heavy cutting board and a stand mixer.
Quick tips
- A 6-inch filler gap beside the fridge fits a slim pull-out for oils and spices.
- Choose a fold-down counter in butcher block — it doubles as a breakfast bar.
- Add outlets on the wall above the fold-down section for small appliances.
Run One Flooring Material Wall to Wall

Every flooring transition is a visual full stop. When a tiny home switches from tile to wood to carpet across 400 square feet, the eye reads three small rooms; one continuous material reads one generous space. During a remodel, committing to a single floor — luxury vinyl plank, engineered wood, or polished concrete — is one of the cheapest ways to manufacture spaciousness.
Best for open-plan remodels and homes where rooms currently feel choppy. Luxury vinyl plank is the pragmatic tiny-home choice: waterproof, warm underfoot, and forgiving over imperfect subfloors. Run the planks parallel to the longest sightline to stretch the room visually, and skip thresholds entirely — even a slim metal strip breaks the flow.
Quick tips
- Carry the same flooring into the bathroom with a waterproof product — no transition, bigger feel.
- Lighter tones reflect more light; mid-tone wood hides daily wear best.
- If stairs to a loft exist, clad them in the same material for continuity.
Go Floor-to-Ceiling With Built-In Storage

Freestanding furniture in a tiny home leaves dead air above it and awkward gaps beside it. Floor-to-ceiling built-ins — a full wall of cabinetry in the living zone, a wardrobe wall in the sleeping area — convert every inch of vertical volume into closed storage while reading as architecture rather than furniture. Closed fronts are the key: they hide the clutter that makes small spaces feel chaotic.
Best for owners drowning in stuff despite “living small,” and for anyone whose tiny home currently relies on mismatched freestanding pieces. Design built-ins around what you actually own — deep shelves for the things you have, not generic compartments. In the living zone, integrate the media setup, a fold-down desk, and display niches into the same wall so one unit does four jobs.
Quick tips
- Keep upper sections for rarely used items; daily things live between knee and shoulder height.
- Paint built-ins the same color as the walls so the storage wall recedes.
- Add interior lighting to deep cabinets — dark caverns become dead space.
Carve Out a Compact Laundry Nook
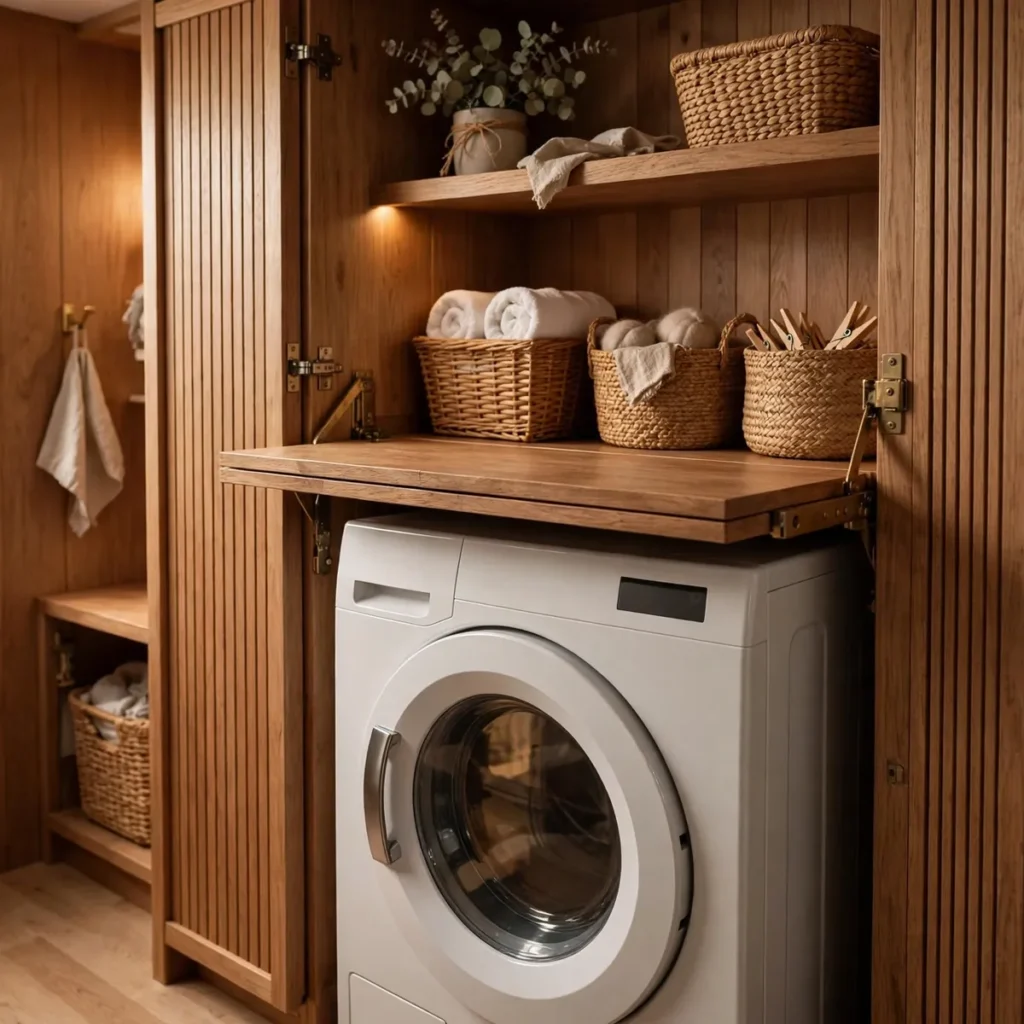
Laundromat runs get old fast, and a full-size washer-dryer pair won’t fit most tiny floor plans — but a 24-inch all-in-one washer-dryer will. The remodel move is carving a dedicated laundry nook: a stacked or single all-in-one unit tucked into a hallway end, under a stair, or in a reconfigured closet, with plumbing roughed in during the renovation when walls are already open.
Best for full-time tiny dwellers, especially couples and remote workers doing laundry weekly. Ventless all-in-one units need only a water supply, drain, and standard outlet — no dryer vent through the envelope, which simplifies the remodel enormously. Enclose the nook with a pocket or bifold door and add a counter above a front-loader for folding.
Quick tips
- Rough in plumbing for the nook even if you buy the machine later — open walls are a one-time opportunity.
- A pull-out drying rack beside the unit handles delicates without floor space.
- Choose a quiet model (under ~55 dB) — in a tiny home you hear everything.
Upgrade Insulation and Add a Mini-Split
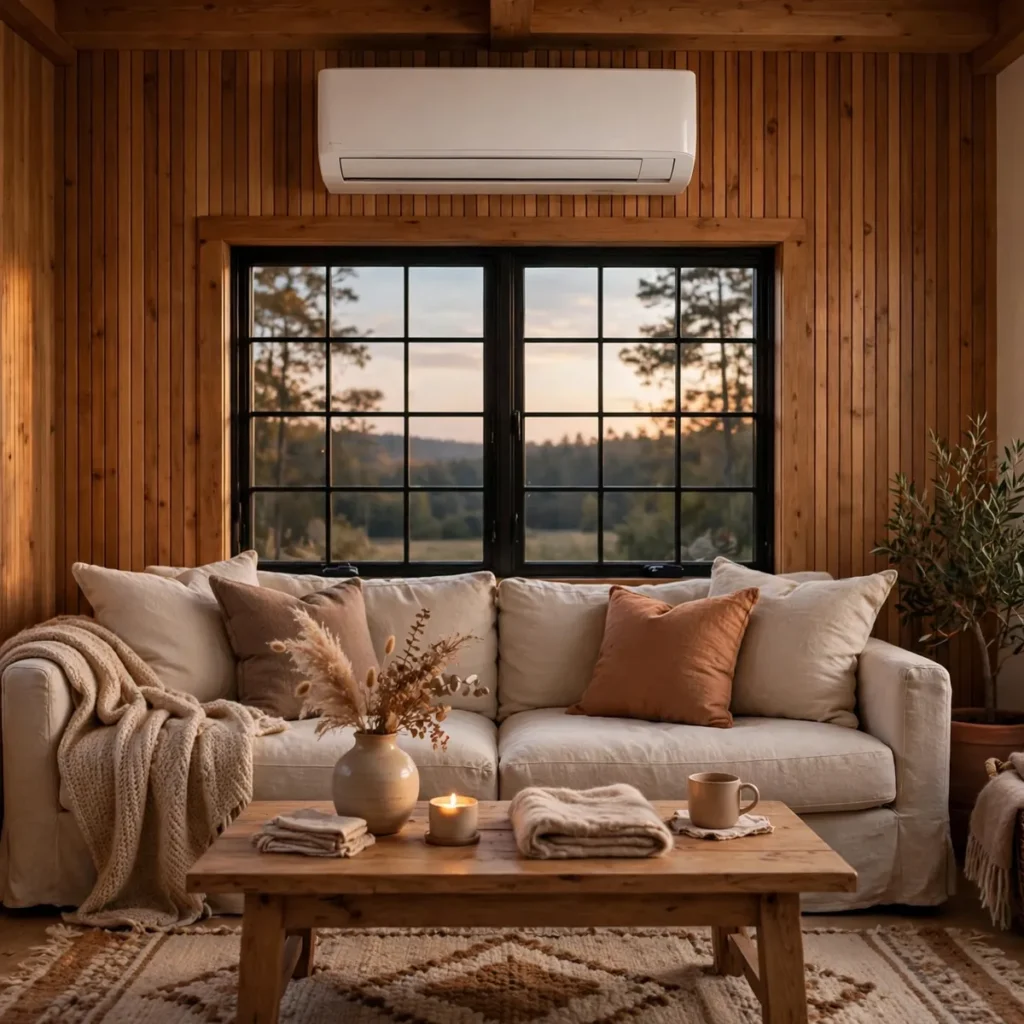
Comfort is a remodel category most tiny-home content skips, yet nothing ruins small-space living like a home that’s freezing at the floor and roasting at the loft. Opening walls during a remodel is the moment to upgrade insulation — closed-cell spray foam both insulates and air-seals in the thin wall cavities tiny builds allow — and to install a ductless mini-split that heats and cools the whole footprint from one whisper-quiet head.
Best for four-season tiny homes and anyone whose current heating is a space heater and hope. A single 9,000–12,000 BTU mini-split typically covers a well-insulated tiny home; the loft will still run warmer, so plan a small transfer fan or louvered vent to balance temperatures. The result is even comfort, lower bills, and no combustion appliance eating precious floor space.
Quick tips
- Air-seal first, insulate second — drafts waste more energy than thin walls.
- Mount the mini-split head to blow along the long axis of the home, not at the loft.
- Keep one operable window per zone for shoulder-season natural ventilation.
Replace Solid Walls With Glass Partitions
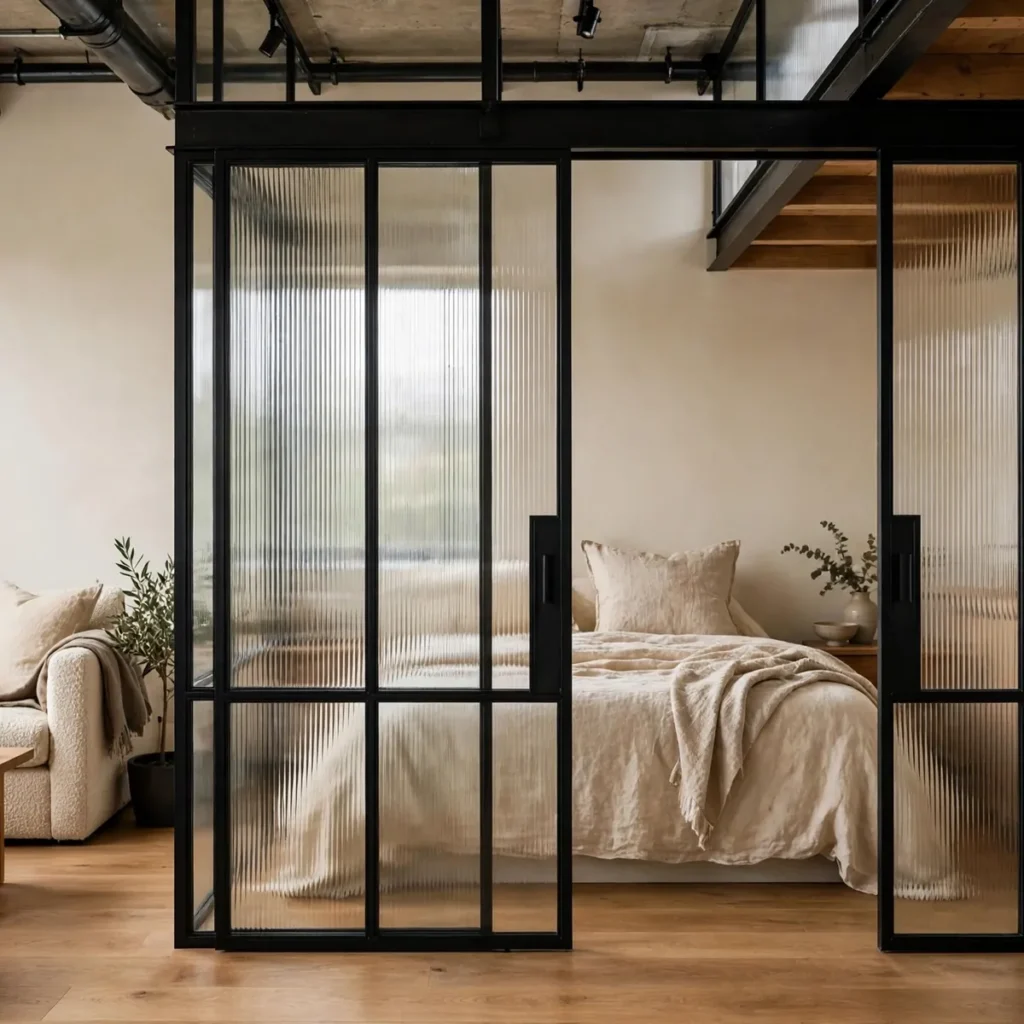
Where a wall can’t come down — a bedroom that needs real privacy, a bathroom wall, a home-office nook — replace the upper half with glass. A steel-framed glass partition or a simple interior window keeps the acoustic and visual separation you need while letting daylight and sightlines pass straight through. The rooms on both sides instantly feel connected to the whole home instead of boxed off from it.
Best for loft railings, bedroom-to-living dividers, and home-office corners. Frosted or reeded glass gives privacy where clear glass feels exposed; black steel frames add the industrial-loft look that suits tiny homes beautifully. For bedrooms, pair the glass with a blackout curtain on a ceiling track for nighttime privacy.
Quick tips
- Use tempered or laminated glass for any partition — building code and safety both demand it.
- Reeded glass blurs shapes while transmitting light; ideal for bathrooms.
- Keep the glass as one large pane rather than many small lites for a cleaner, bigger feel.
Create a Day-to-Night Zone With a Wall Bed
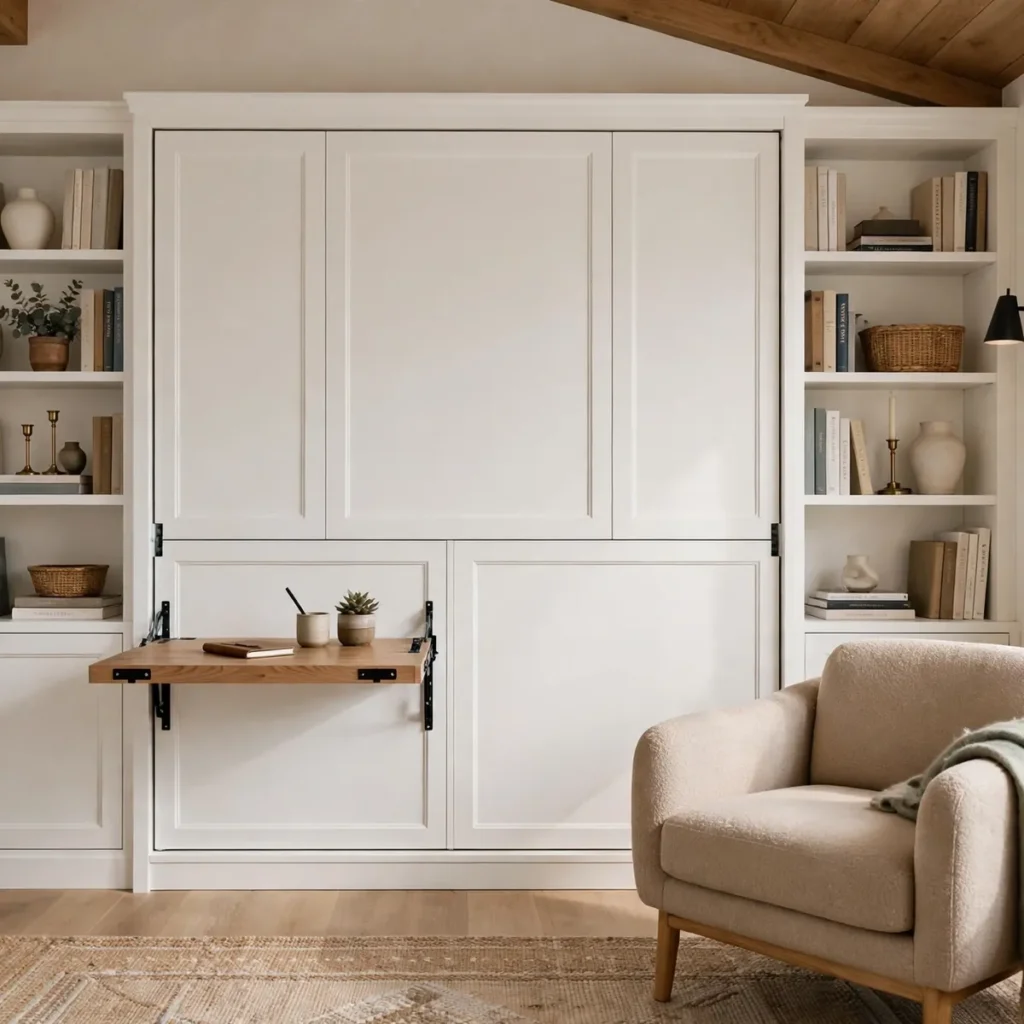
In a tiny home, a permanently made bed is a room that only works eight hours a day. A wall bed (Murphy bed) integrated into a built-in wall unit flips the equation: by day the room is a lounge, office, or dining space; by night it’s a real bedroom with a proper mattress. Modern mechanisms are counterbalanced, genuinely easy to operate daily, and far more comfortable than any sofa bed.
Best for studio-style tiny homes and guest-ready setups where the living room must double as the bedroom. Build the wall bed into the same built-in wall as shelving and a fold-down desk so the unit earns its footprint three ways. Side-mount mechanisms suit narrow rooms; the bed folds up along its long edge and needs less floor clearance.
Quick tips
- Choose a real mattress (8–10 inches) — daily sleep quality is non-negotiable.
- Add reading lights and a small shelf on the bed face so it functions as a headboard wall by day.
- Strap bedding in place with the unit’s retention straps to make the daily flip effortless.
Rewire for Layered, Recessed Lighting

A single ceiling fixture in each room flattens a tiny home and leaves corners in gloom — and gloom reads as small. A remodel is the moment to rewire for layers: recessed downlights for even ambient light, LED strips under cabinets and along the loft edge for warmth, and a statement pendant or two for character. Each layer on its own dimmer or switch lets one small space shift from bright work mode to evening lounge.
Best for homes still lit by one harsh overhead per room. In low tiny-home ceilings, 3- or 4-inch recessed LEDs disappear into the ceiling plane; place them to wash walls rather than to spotlight the floor — lit walls make rooms feel wider. Warm color temperature (2700–3000K) keeps the small space cozy rather than clinical.
Quick tips
- Put every layer on a dimmer — flexibility matters more in one multi-use room.
- Light the inside of glass-front cabinets; glowing shelves add depth.
- Add motion-sensor strip lighting in the bathroom and under-bed for nighttime.
Open the Wall to the Outdoors With Folding Doors
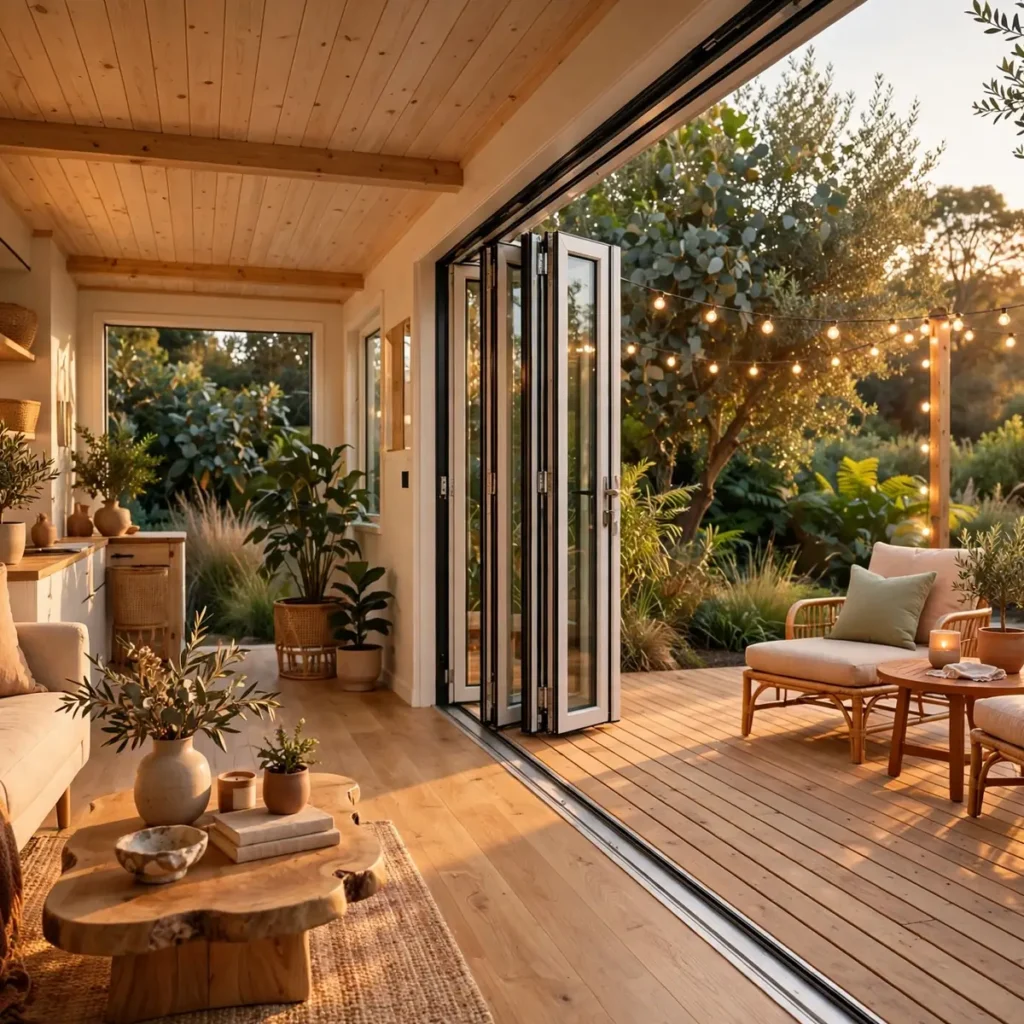
The most dramatic square-footage gain in a tiny home remodel costs no interior space at all: replace a standard door and window with a wide folding or sliding glass wall that opens the living zone directly onto a deck. When the wall disappears, the deck becomes a seasonal second living room, and even closed, the full-height glass pulls the landscape — and the light — deep into the home.
Best for tiny homes on owned land with a usable outdoor aspect, and for warm-climate dwellers who’ll live half outdoors. This is a structural move: the opening needs a proper header, flashing, and a threshold detail that keeps water out. Pair it with a deck built at interior floor level so inside and outside read as one continuous plane.
Quick tips
- Size the deck as a true room — at least 10×10 feet — or it won’t function as living space.
- Choose lift-and-slide over bifold where wind or budget is a concern; fewer seals to maintain.
- Extend the interior flooring color onto the deck boards to blur the boundary.
Paint Walls, Trim, and Ceiling One Color
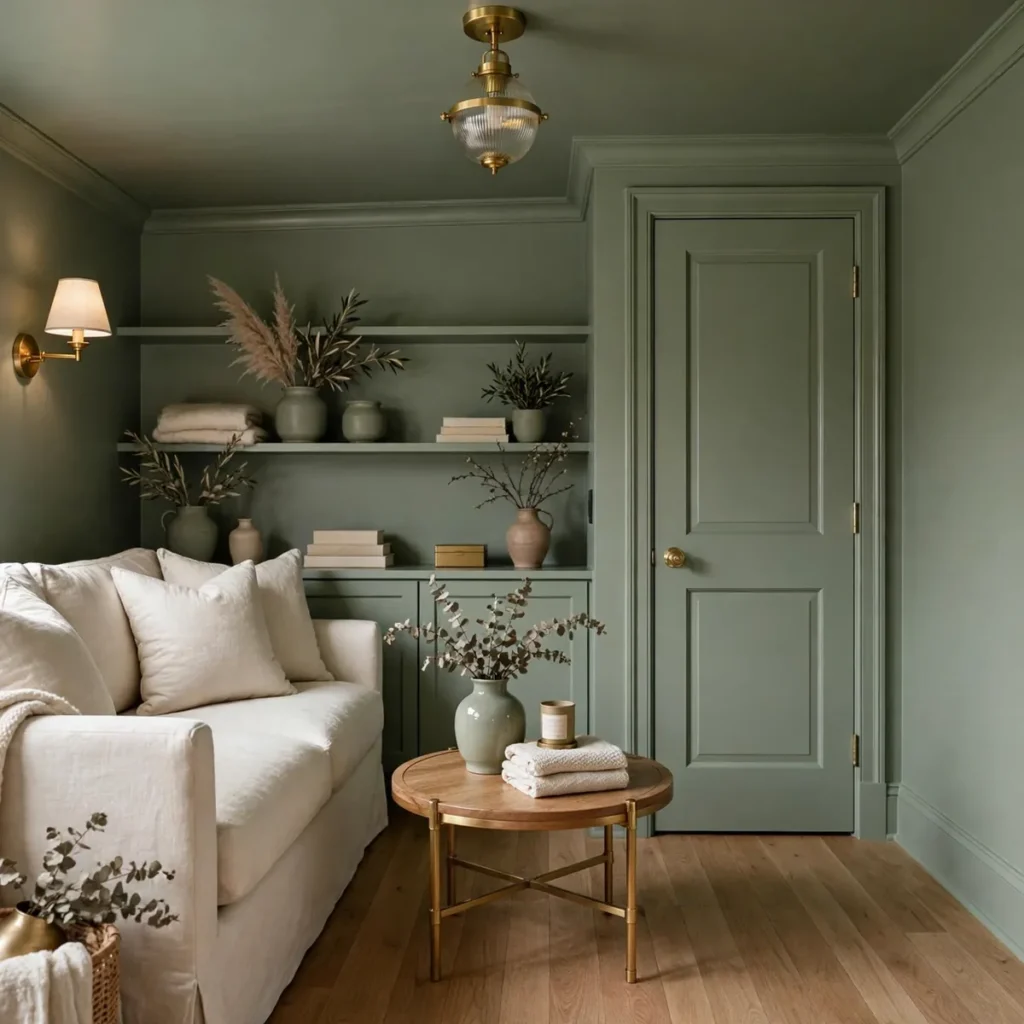
Here’s the finishing move that makes every structural change above read even larger: paint the walls, trim, doors, and ceiling the same color. Contrasting white trim chops a small room into outlined boxes; a single enveloping color dissolves edges, blurs where wall meets ceiling, and lets the architecture — not the paint lines — define the space. In a tiny home, that visual quiet is transformative.
This final long-paragraph idea deserves emphasis because it ties the whole remodel together: color drenching works in any palette, from warm white to deep forest green, because the effect comes from continuity rather than lightness — a dark enveloping color actually makes a tiny bedroom feel like a cocoon rather than a box, while a pale warm white makes the main living zone glow. It costs one decision and a few gallons of paint, yet it amplifies thousands of dollars of structural work, which is why designers treat it as the remodel’s closing move rather than an afterthought. Best for the final phase of any tiny home renovation, once the layout, light, and storage are settled.
Quick tips
- Use the same sheen throughout (eggshell walls, satin trim in the same color) for subtle depth.
- Test the color on a large board moved around the home — tiny rooms shift tone dramatically with light.
- Keep one saturated accent — a door, a nook — so the envelope doesn’t feel flat.
FAQs
How much does a tiny home remodel cost?
It depends entirely on scope: cosmetic refreshes (paint, flooring, lighting) can run a few thousand dollars, while structural work like wet-room bathrooms, new openings, or full kitchen reconfigurations climb much higher. Because the footprint is small, material costs stay low — labor and plumbing/electrical work drive the budget. Get three quotes and keep a 15% contingency.
Do I need a permit to remodel a tiny home?
Often yes, especially for structural changes, new openings, plumbing, or electrical work — and rules vary wildly between a tiny home on a foundation, one on wheels, and one classified as an ADU. Check with your local building department before opening walls; unpermitted work can complicate insurance and resale.
What is the single highest-impact tiny home remodel?
Opening up the floor plan. Removing even one interior wall between the kitchen and living area changes sightlines, daylight flow, and how large the entire home feels — more than any finish upgrade. Pair it with continuous flooring and the gain multiplies.
finish upgrade. Pair it with continuous flooring and the gain multiplies.
Conclusion
A tiny home remodel earns its keep when it changes how the home lives, not just how it looks. Open the layout, engineer the light, build storage into the structure itself, and upgrade the systems that keep the small envelope comfortable — then let a single enveloping paint color tie it all together. Plan the structural moves first, phase the work around the walls being open, and you’ll end up with a small home that feels anything but.